
Every branch set up, every action recorded.
Run several companies and branches in one system, decide exactly who can do what, and keep a record of every change.
- rights per screen
- 7
- rights per screen
- overrides
- Per user
- overrides
- change logged
- Every
- change logged
How it works
2 steps, one system.
Press ? on any step to read the same help your team sees inside LogiSoft.
- 01
Set up companies and branches
?LogiSoft help
Branches
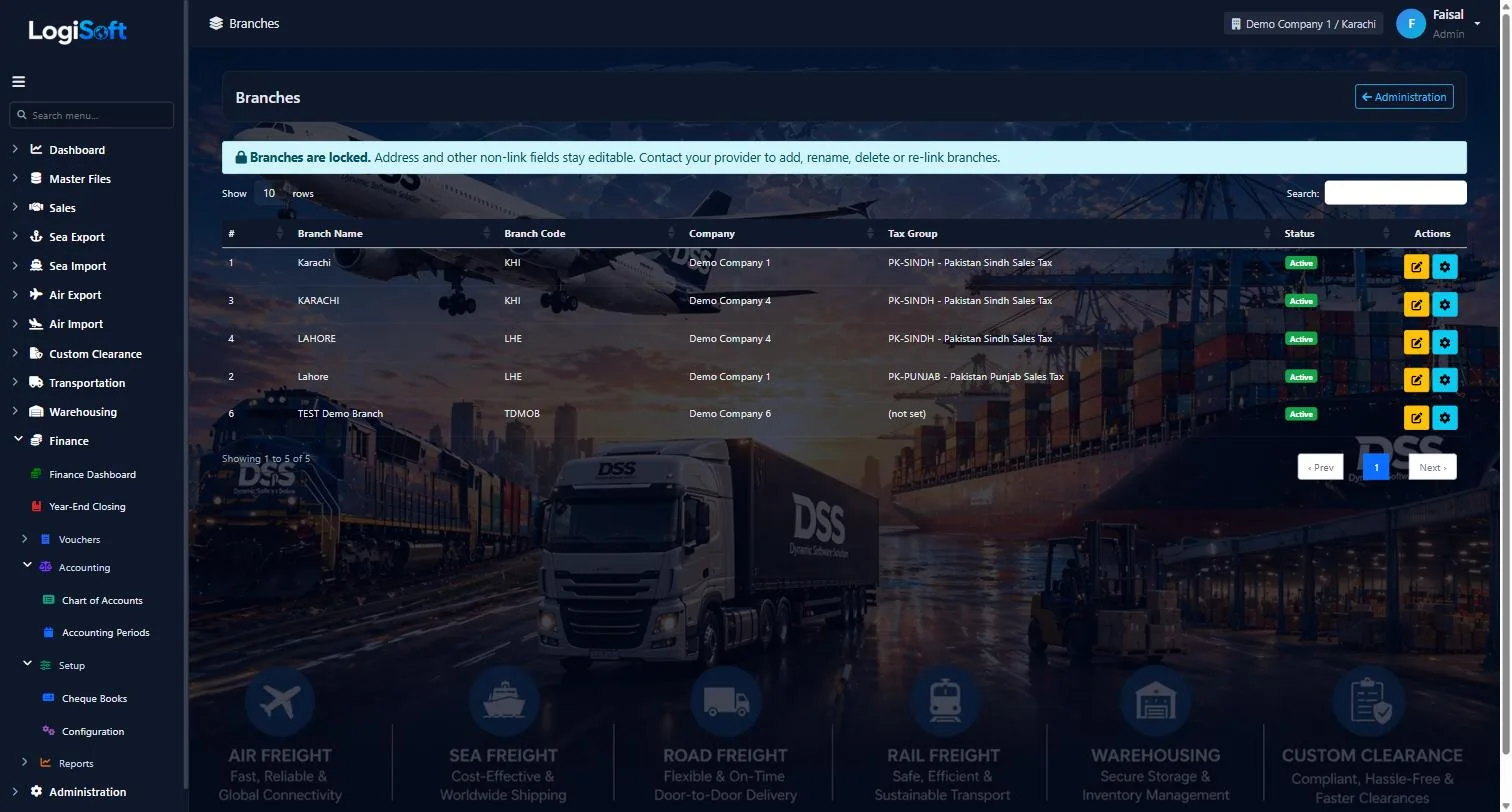
Branches are office locations under a company. Users are assigned to one or more branches. Reports and document numbering can scope by branch.
A Branch is a physical office or operational location belonging to a Company. One Company can have many Branches (e.g. Karachi, Lahore, Dubai office of the same legal entity).
Why branches matter:
- Users are scoped to one or more branches — operations staff in Karachi don't need to see Lahore's pending shipments
- Reports filter by branch so each office sees its own work
- Default Tax Group per branch — invoices created from this branch automatically apply that tax group (useful when branches in different jurisdictions have different VAT/GST rules)
- Document numbering can include the branch code (e.g. KHI-INV-2026-00001 vs LHE-INV-2026-00001)
Common tasks
- 1. Click **+ Add Branch**
- 2. Pick the parent **Company**
- 3. Enter the branch name (e.g. "Karachi") and a short code (e.g. "KHI")
- 4. Optionally set a default **Tax Group**
- 5. Save
- 6. Open **Users** to assign staff to this branch
The same help appears on this screen inside LogiSoft.
Company groups, companies and branches, each branch with its own tax group and defaults.
- 02
Decide who can do what
?LogiSoft help
Role Permissions
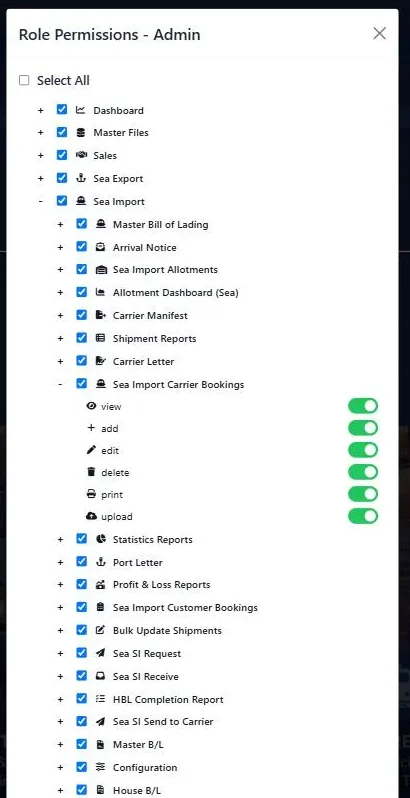
Set which screens and which actions each Role can perform. This is the foundation of LogiSoft's permission system. Configure this after creating Roles.
Role Permissions is where you tick the boxes for what each Role is allowed to do.
The grid is organized as: Module → Screen → Right (view / add / edit / delete / print).
Tick a box → that role can perform that action on that screen.
Untick → the action button is visible but disabled (LogiSoft never hides — it disables, so users know the feature exists).
Best practice — use the principle of least privilege:
- Admin — everything ticked
- Operations — view / add / edit on operational screens; no delete; no admin screens
- Sales — view / add / edit on sales + customer screens
- Accountant — view / add / edit on finance screens; view-only on operations
- Read-only auditor — view-only on everything
Need exceptions? Use [User Permissions](/UserPermissions/Index) to override per-user without changing the role.
Common tasks
- 1. Pick a Role from the dropdown
- 2. The grid shows every Module → Screen with 5 right checkboxes
- 3. Tick / untick boxes
- 4. Save
- 5. Test by logging in as a user with that role and checking which screens / buttons appear
The same help appears on this screen inside LogiSoft.
Give each role rights per screen, then fine-tune individual users.
- View, add, edit, delete, print, upload and post
- User overrides and date-access limits
- Branch data stays with its branch
Every screen
14 screens in Administration.
The complete list of screens in this module, described in LogiSoft's own help. Press ? for the full explanation.
Dashboard
-
Administration Dashboard
?LogiSoft help
Administration
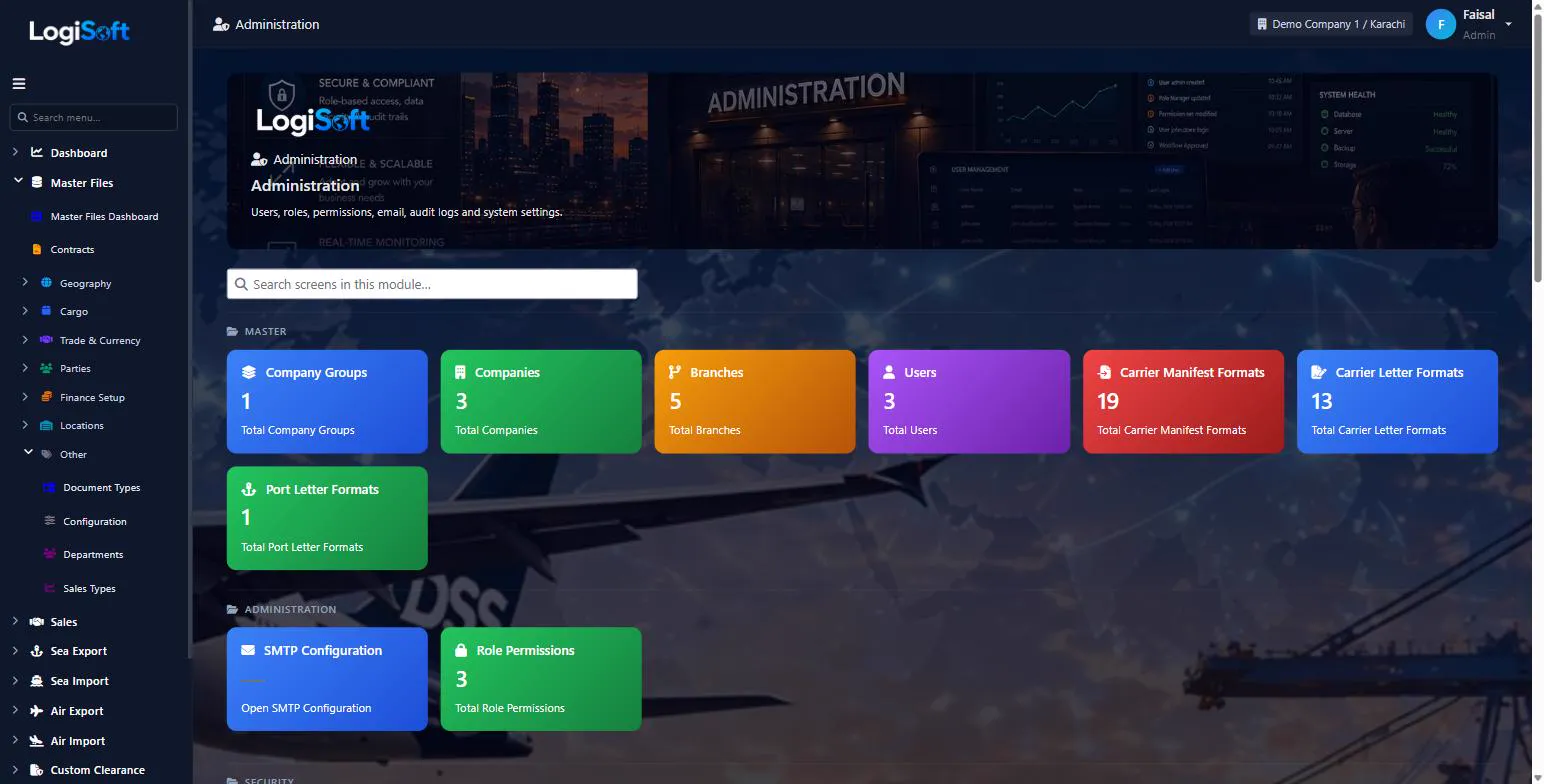
Users, roles, permissions, email, audit logs, system settings, and help/chat content.
The Administration module is the control room of LogiSoft.
- Users + Roles — create users, assign roles. A user can hold multiple roles.
- Role Permissions / User Permissions — granular tree per Module → Screen → Right.
- Branches + Companies + Company Groups — multi-tenancy hierarchy.
- SMTP — configure outgoing email server used for password resets, escalations, etc.
- Module Settings — per-module key/value config (some keys are encrypted).
- Audit Logs — every Add/Edit/Delete is recorded here automatically.
- Help — Field Hints / Screen Topics / Workflows — in-app help content management.
- Chat — FAQs / Logs — assistant FAQ corpus + moderation queue.
Common tasks
- Add a new user → assign at least one role → grant Company/Branch access
- Adjust Role Permissions when a new screen is added
- Configure SMTP before relying on any email feature
- Review Chat Logs to approve good answers or flag bad ones
The same help appears on this screen inside LogiSoft.
Users, roles, permissions, email, audit logs, system settings, and help/chat content.
Master
-
Company Groups
?LogiSoft help
Company Groups
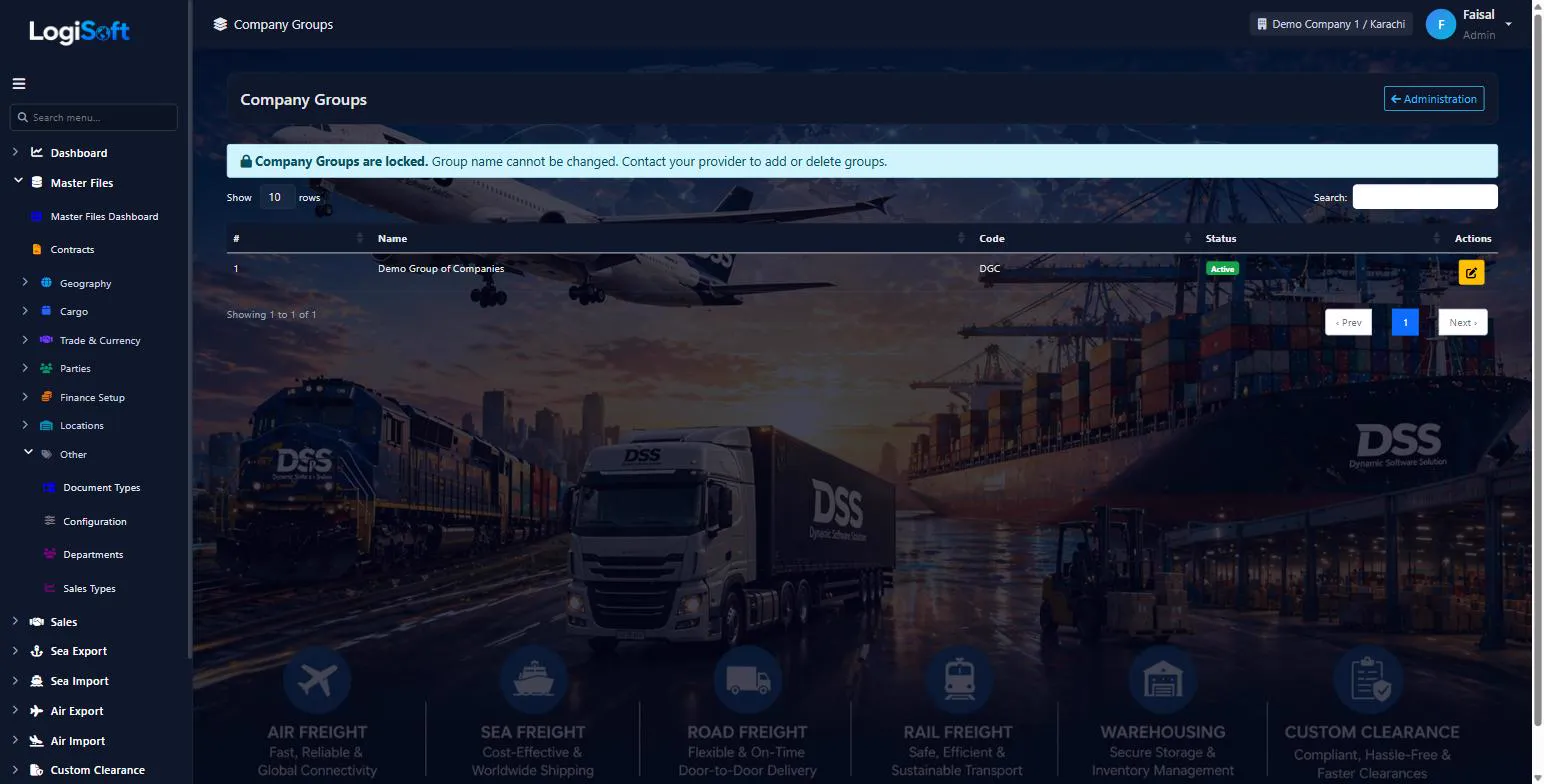
Company Groups are parent holding groups for multiple Companies. Use them when one organization owns several legal entities and needs consolidated reporting.
A Company Group is a parent holding entity that owns multiple Companies. It's optional — you can have Companies without a Group.
When to use Company Groups:
- You operate one corporate group across multiple jurisdictions, each with its own legal entity
- You want consolidated P&L / volume reports across all Companies under the Group
- Different Companies under the Group share customers / vendors / charges via the master data
When NOT to use:
- Single-legal-entity operations (just create a Company without a Group)
- Different brands of the same Company (use Branches or trade names instead)
Common tasks
- 1. Click **+ Add Company Group**
- 2. Enter Group Name and code
- 3. Save
- 4. Open [Companies](/Companies/Index) and assign companies to this group
The same help appears on this screen inside LogiSoft.
Company Groups are parent holding groups for multiple Companies. Use them when one organization owns several legal entities and needs consolidated reporting.
-
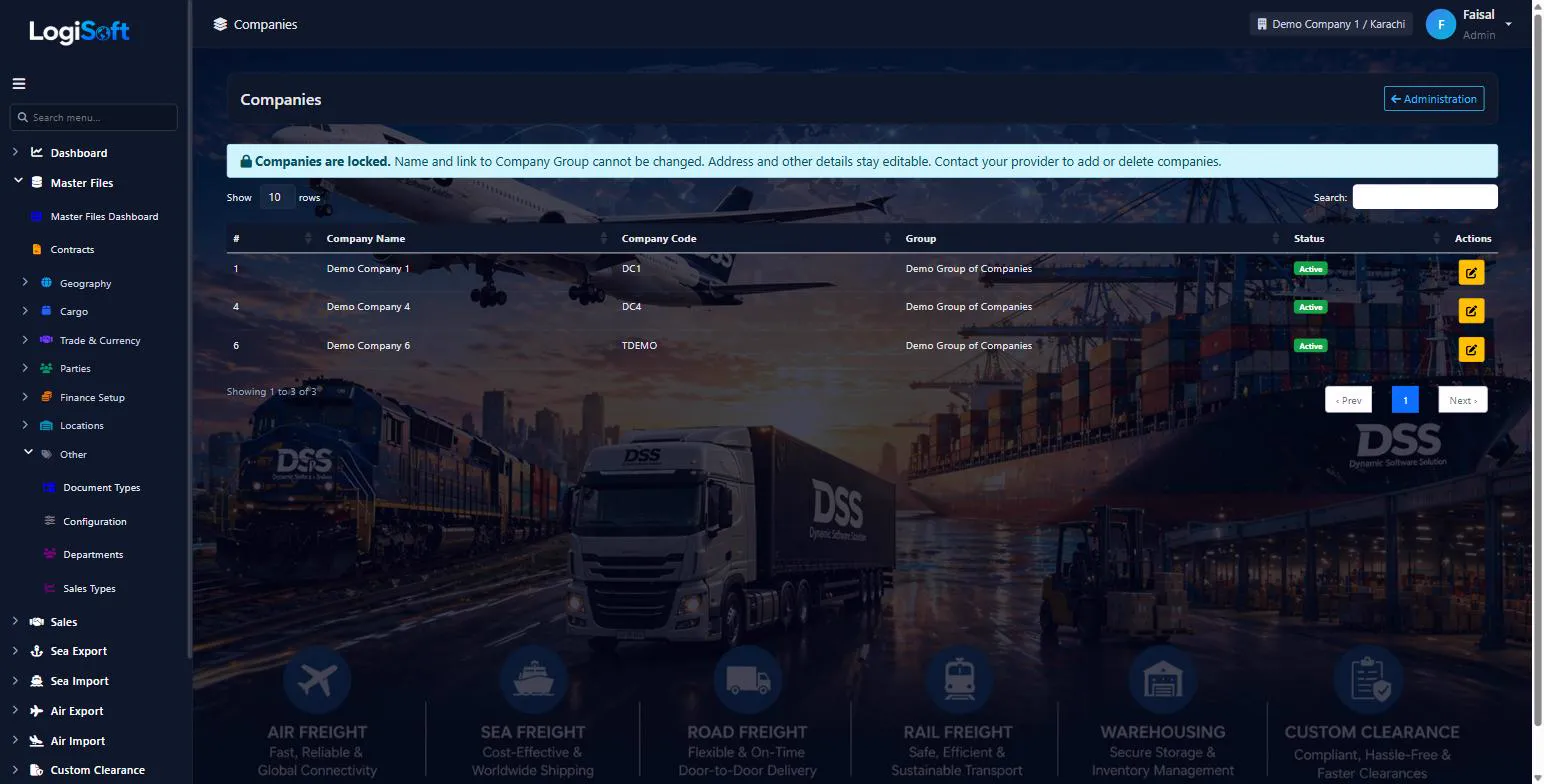
Companies
?LogiSoft help
Companies
Companies are the legal entities you operate as. Branches sit under a Company. One LogiSoft tenant can have multiple Companies (a holding group with several legal entities).
A Company is a legal entity registered in your jurisdiction (e.g. "ABC Logistics Pvt. Ltd."). Each company has:
- A legal name + trade name
- A tax/registration number (NTN, VAT, GST, etc.)
- One or more Branches (offices / locations) underneath it
- Optionally a parent Company Group for consolidated reporting
When LogiSoft generates invoices, the Company is the legal payer/payee on the document — not the branch.
Common configurations:
- One Company, many Branches — single legal entity with multiple offices (Karachi, Lahore, Islamabad)
- Many Companies under one Group — holding company with separate legal entities per country/regulatory zone
Common tasks
- 1. Click **+ Add Company**
- 2. Enter Legal Name, Trade Name, Tax Number, address, phone, email
- 3. Optionally pick a **Company Group**
- 4. Save
- 5. Open [Branches](/Branches/Index) and add at least one branch under this company
The same help appears on this screen inside LogiSoft.
Companies are the legal entities you operate as. Branches sit under a Company. One LogiSoft tenant can have multiple Companies (a holding group with several legal entities).
-
Branches
?LogiSoft help
Branches
Branches are office locations under a company. Users are assigned to one or more branches. Reports and document numbering can scope by branch.
A Branch is a physical office or operational location belonging to a Company. One Company can have many Branches (e.g. Karachi, Lahore, Dubai office of the same legal entity).
Why branches matter:
- Users are scoped to one or more branches — operations staff in Karachi don't need to see Lahore's pending shipments
- Reports filter by branch so each office sees its own work
- Default Tax Group per branch — invoices created from this branch automatically apply that tax group (useful when branches in different jurisdictions have different VAT/GST rules)
- Document numbering can include the branch code (e.g. KHI-INV-2026-00001 vs LHE-INV-2026-00001)
Common tasks
- 1. Click **+ Add Branch**
- 2. Pick the parent **Company**
- 3. Enter the branch name (e.g. "Karachi") and a short code (e.g. "KHI")
- 4. Optionally set a default **Tax Group**
- 5. Save
- 6. Open **Users** to assign staff to this branch
The same help appears on this screen inside LogiSoft.
Branches are office locations under a company. Users are assigned to one or more branches. Reports and document numbering can scope by branch.
-
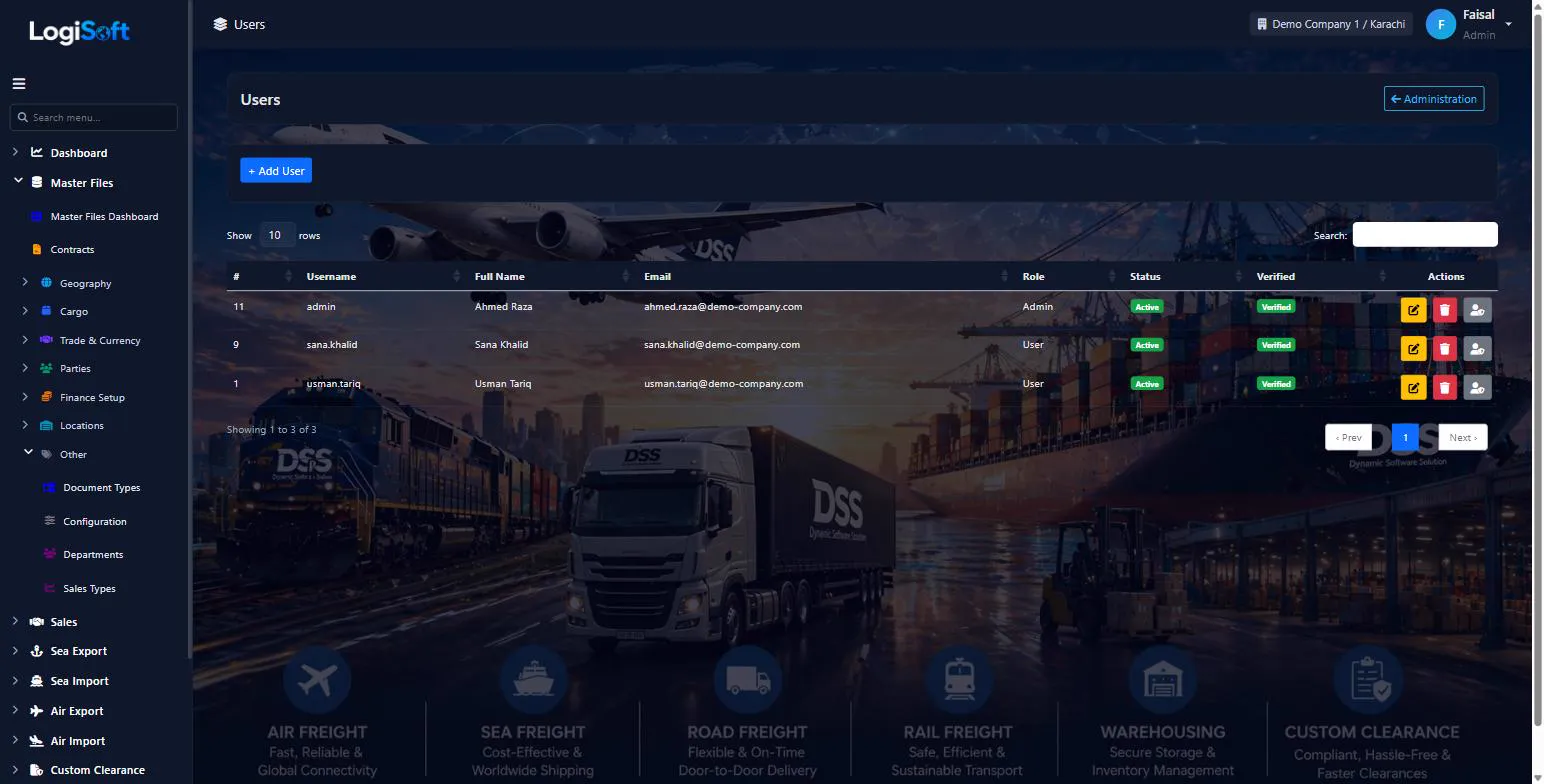
Users
?LogiSoft help
Users
Users are staff login accounts. Each user must have a role and at least one branch. Deactivating a user revokes login without deleting their history.
Users are people who log in to LogiSoft. Each user has a Role that grants module/screen access, plus a list of allowed Companies and Branches. The Companies & Branches tab on the user form controls which branches the user can read and write data in. Operational records (bookings, sales, GRN) created by this user are stamped with the active branch from their header switcher.
Common tasks
- **Add a user**: click + Add User, fill basic fields, pick a role, then go to the Companies & Branches tab and tick the companies and branches the user is allowed to work with.
- **Edit assignments**: open Edit, jump to Companies & Branches tab, adjust ticks, Save.
- **Resend OTP**: for users who haven't activated yet, click the Resend OTP icon.
- **Per-screen permissions**: open the Permissions modal (shield icon) to override role defaults at user level.
The same help appears on this screen inside LogiSoft.
Users are staff login accounts. Each user must have a role and at least one branch. Deactivating a user revokes login without deleting their history.
-
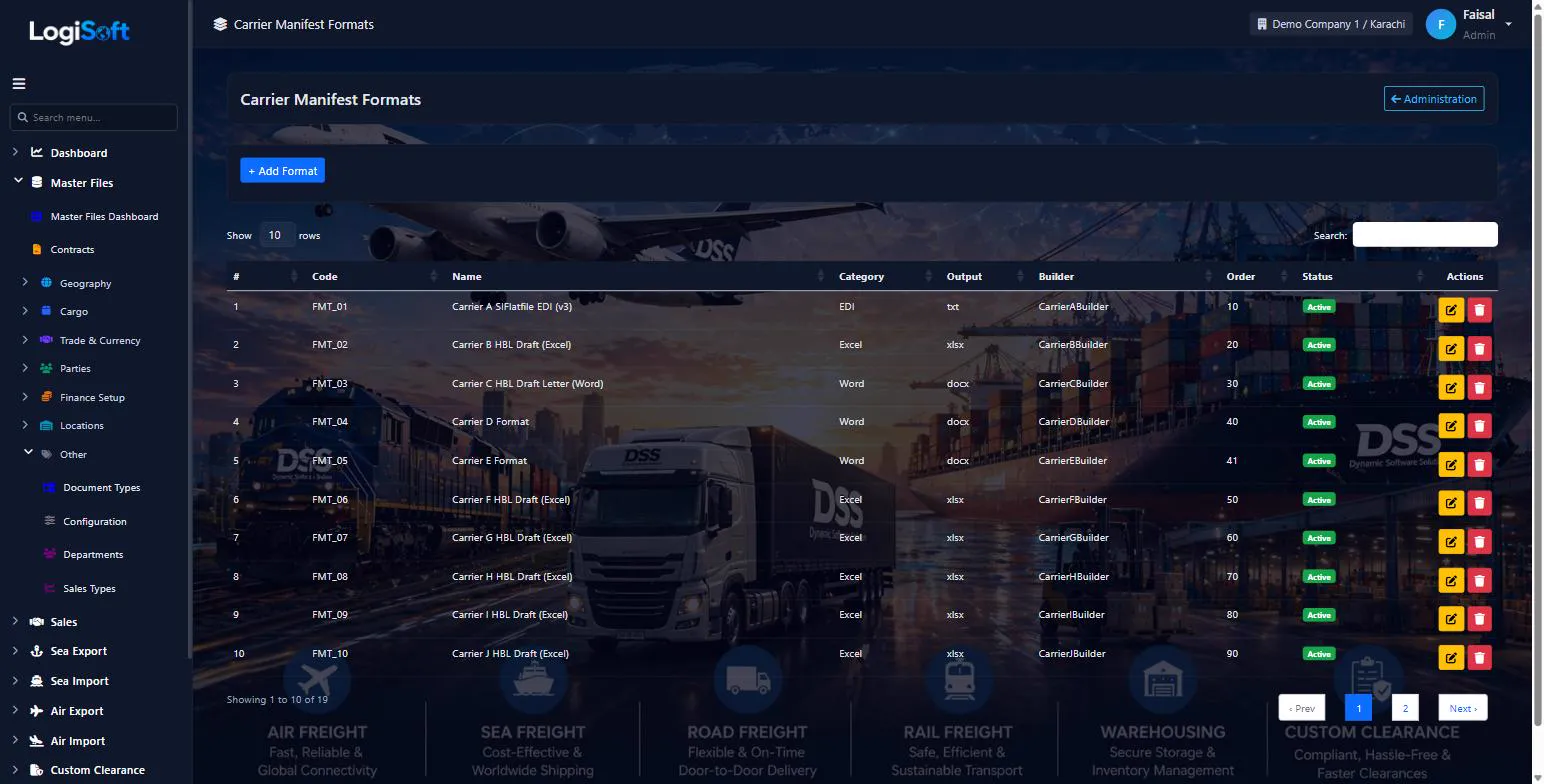
Carrier Manifest Formats
Part of the Administration module.
-
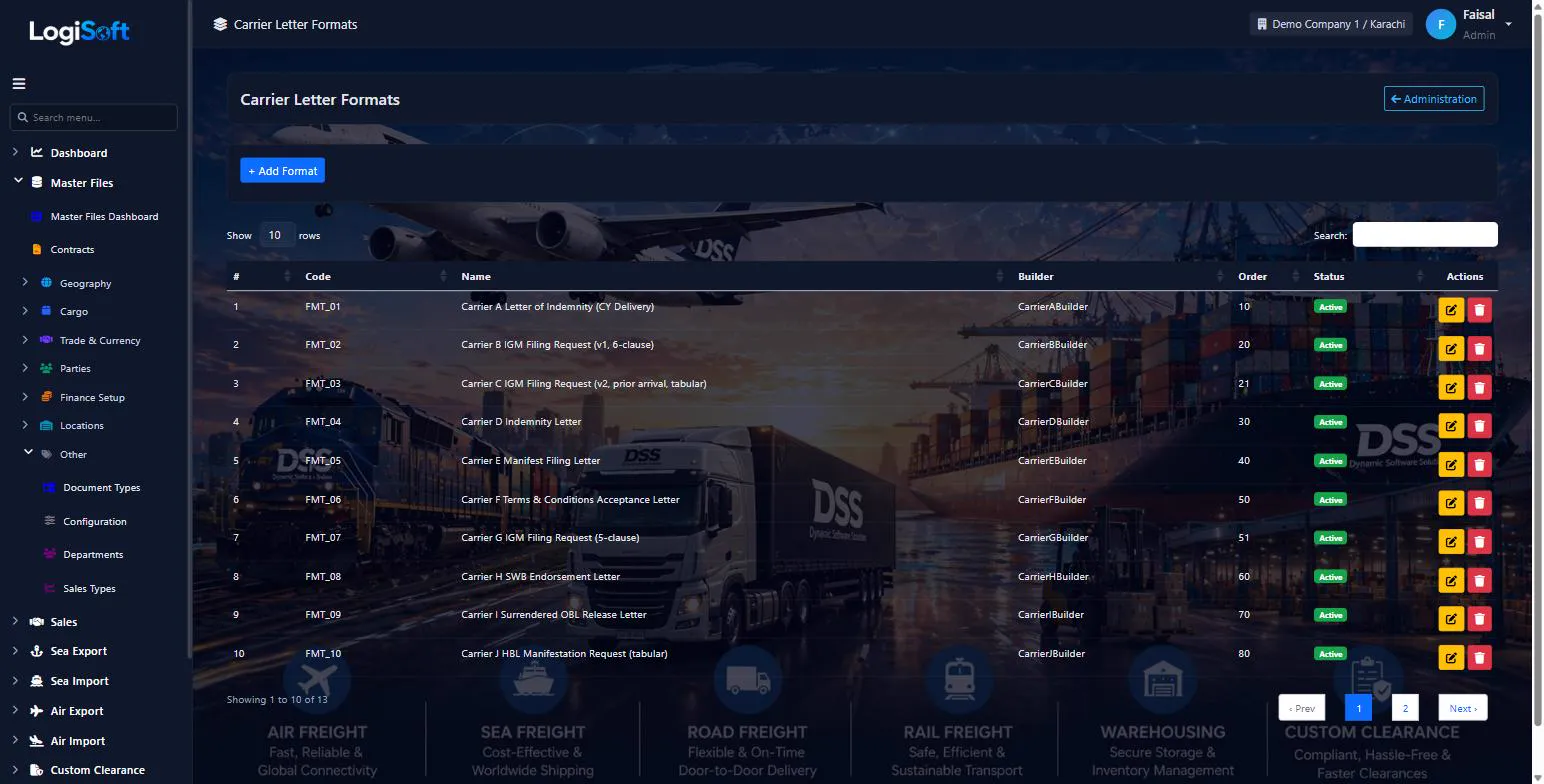
Carrier Letter Formats
Part of the Administration module.
-
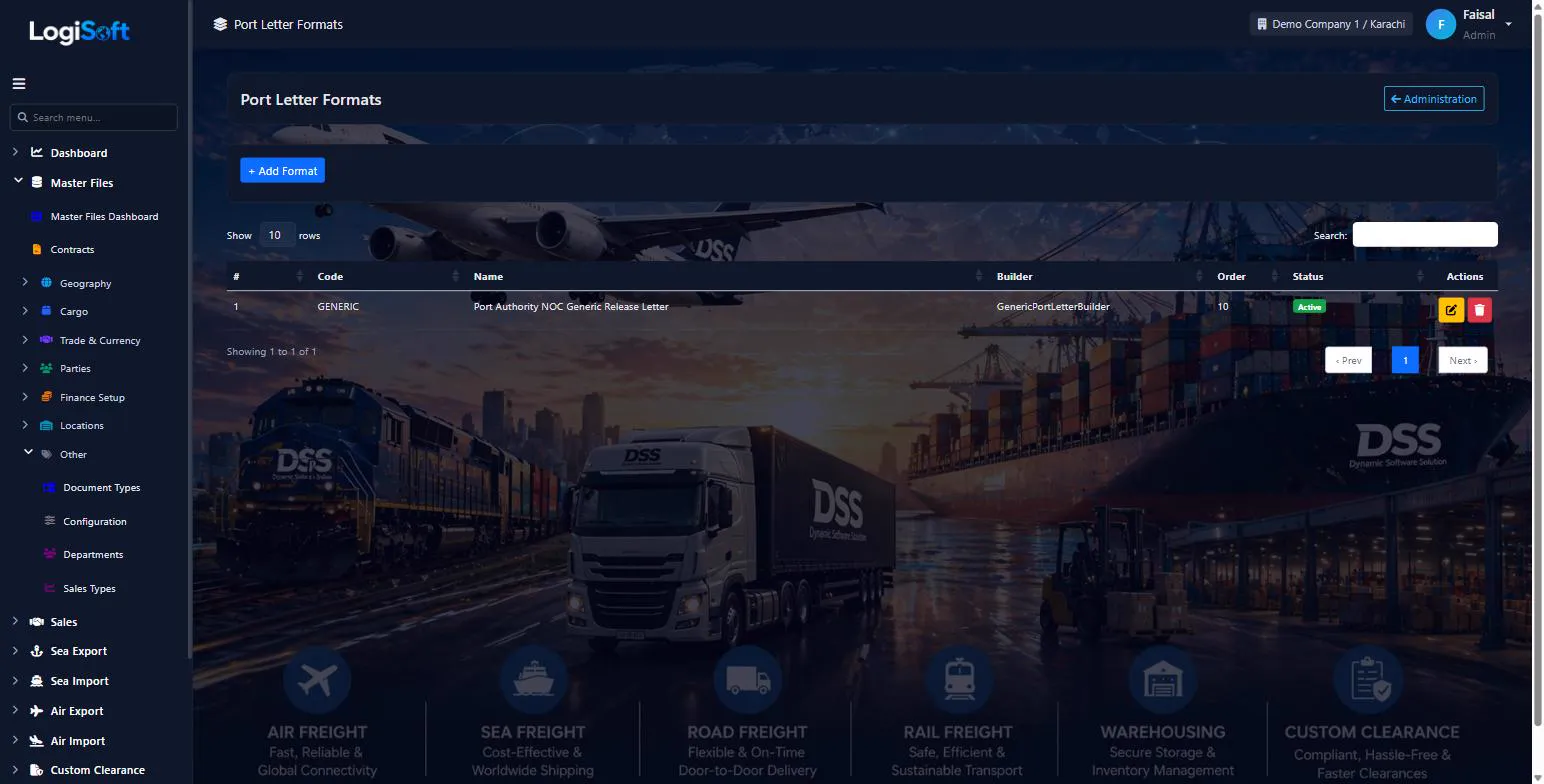
Port Letter Formats
Part of the Administration module.
Administration
-
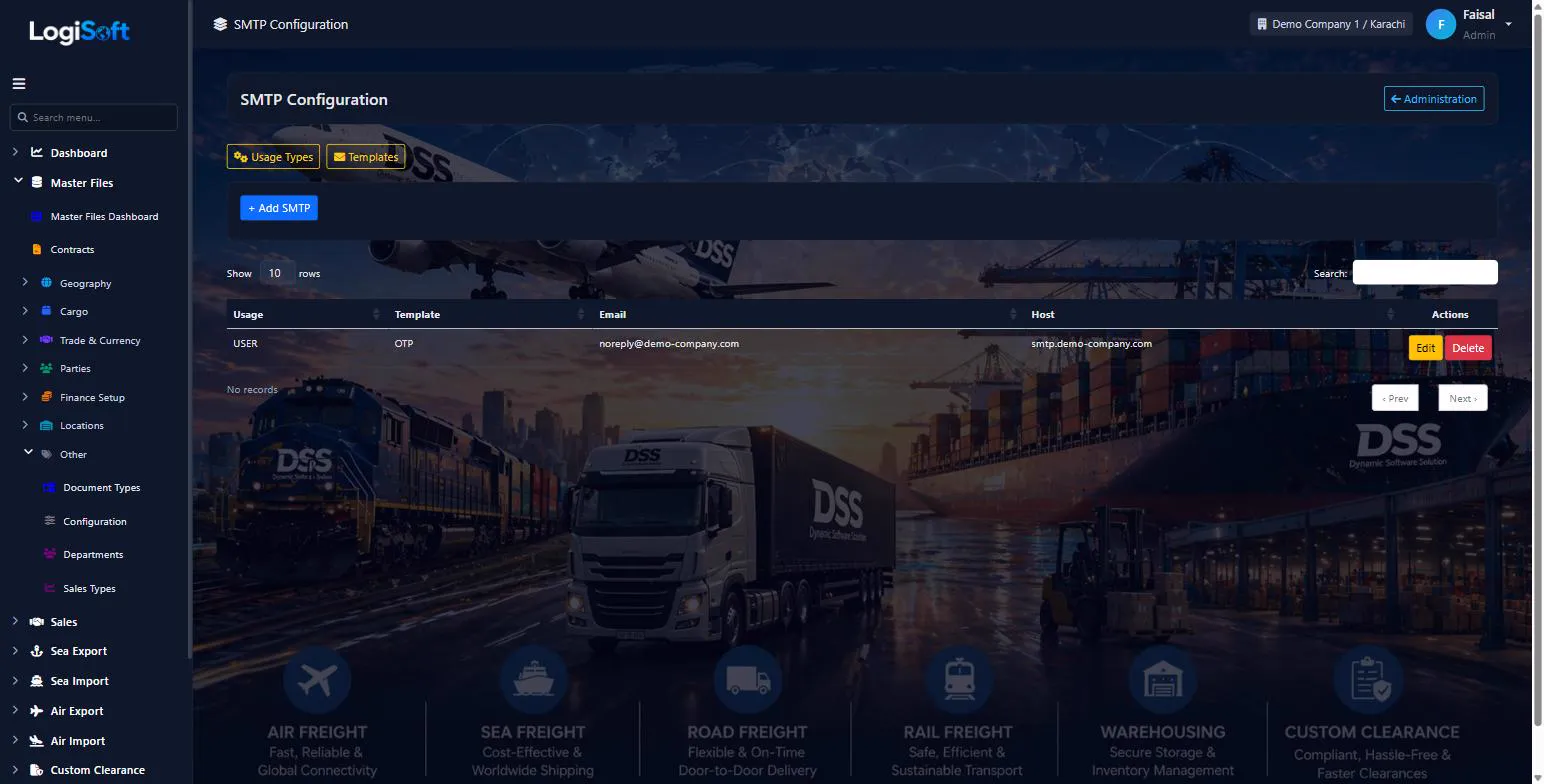
SMTP Configuration
?LogiSoft help
SMTP / Email Profiles
Configure outgoing email servers + templates. Used for SI reminders, chat escalations, invoice emailing, etc.
SMTP screen manages Email Profiles (host, port, credentials, from address) and ties them via Email Usage Mappings to specific Email Templates.
Three tables involved:
- EmailProfiles — connection details for one SMTP server
- EmailTemplates — subject + body templates with placeholders
- EmailUsageMapping — links a usage type (e.g. "ChatEscalation", "SiReminder", "InvoiceEmail") to one profile + one template
When code calls
EmailService.GetEmailConfig("ChatEscalation"), the service looks up that mapping and returns the SMTP config + template — code stays generic, configuration is data-driven.Common tasks
- 1. Email Profiles tab → + Add Profile (Host, Port, SSL, Username, Password, From, Display Name)
- 2. Email Templates tab → + Add Template (Subject + Body with {{placeholders}})
- 3. Email Usage Mappings tab → link a usage type → profile + template
- 4. Test by triggering the relevant action (e.g. SI reminder send)
The same help appears on this screen inside LogiSoft.
Configure outgoing email servers + templates. Used for SI reminders, chat escalations, invoice emailing, etc.
-
Role Permissions
?LogiSoft help
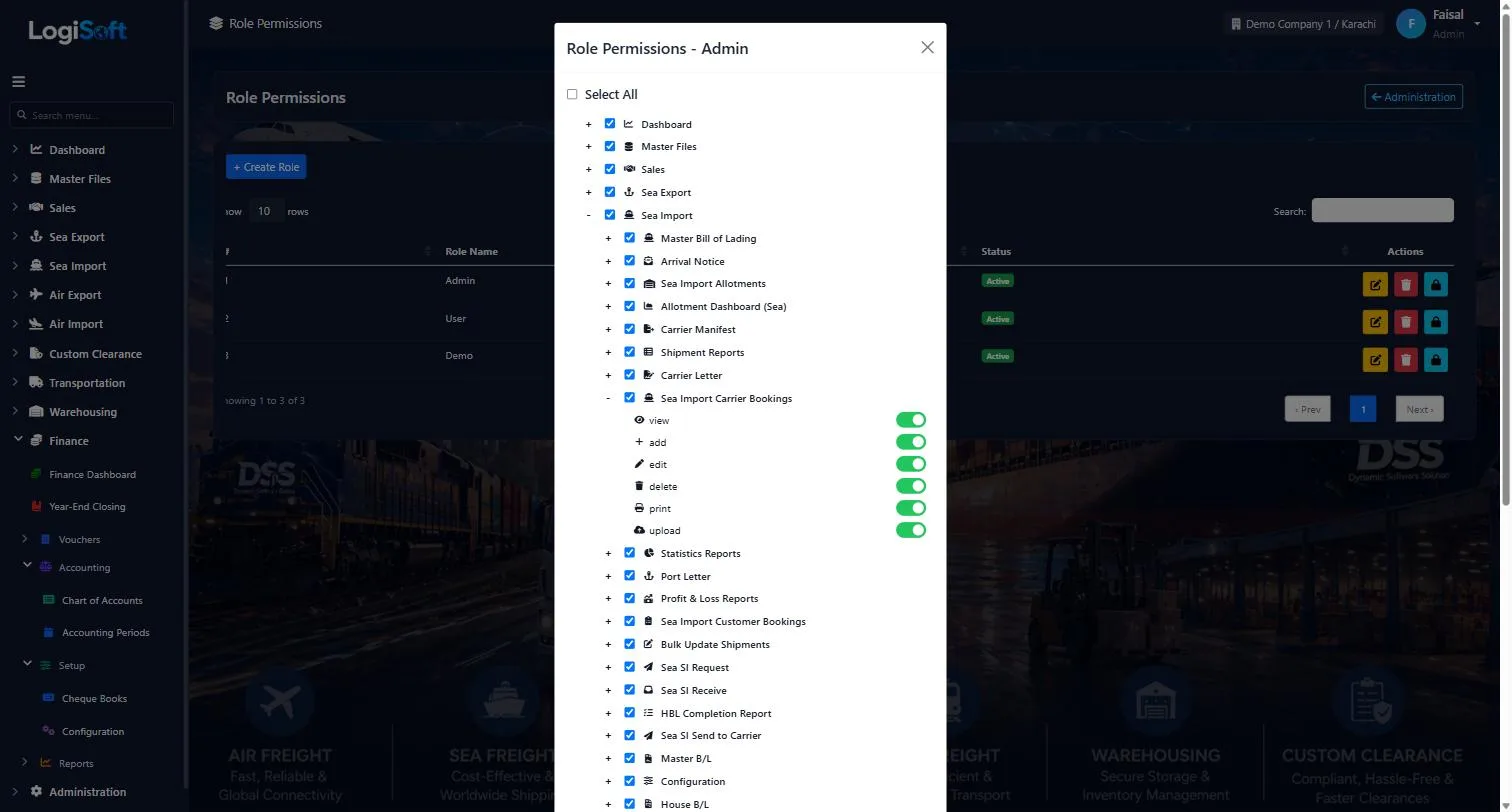
Role Permissions
Set which screens and which actions each Role can perform. This is the foundation of LogiSoft's permission system. Configure this after creating Roles.
Role Permissions is where you tick the boxes for what each Role is allowed to do.
The grid is organized as: Module → Screen → Right (view / add / edit / delete / print).
Tick a box → that role can perform that action on that screen.
Untick → the action button is visible but disabled (LogiSoft never hides — it disables, so users know the feature exists).
Best practice — use the principle of least privilege:
- Admin — everything ticked
- Operations — view / add / edit on operational screens; no delete; no admin screens
- Sales — view / add / edit on sales + customer screens
- Accountant — view / add / edit on finance screens; view-only on operations
- Read-only auditor — view-only on everything
Need exceptions? Use [User Permissions](/UserPermissions/Index) to override per-user without changing the role.
Common tasks
- 1. Pick a Role from the dropdown
- 2. The grid shows every Module → Screen with 5 right checkboxes
- 3. Tick / untick boxes
- 4. Save
- 5. Test by logging in as a user with that role and checking which screens / buttons appear
The same help appears on this screen inside LogiSoft.
Set which screens and which actions each Role can perform. This is the foundation of LogiSoft's permission system. Configure this after creating Roles.
Security
-
Audit Logs
?LogiSoft help
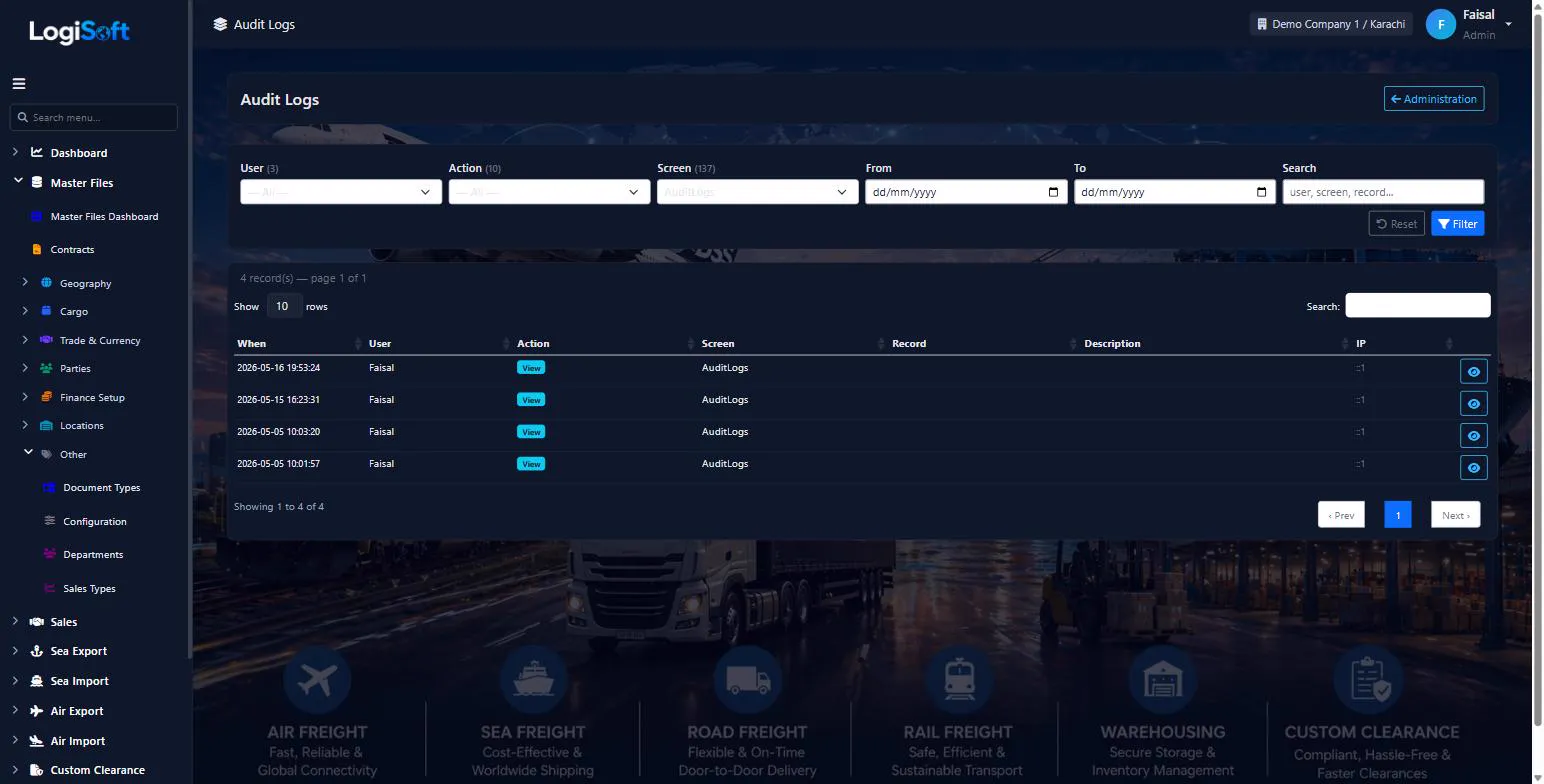
Audit Logs
Append-only log of every CREATE / EDIT / DELETE / page-view across the system. Filterable by user, screen, date.
Audit Logs records who did what, when. Every Save / Update / Delete in any controller (via
AuditServicefromMasterBaseController) writes a row with:- ScreenName
- UserId + Username
- ActionType (Add / Edit / Delete / View)
- RecordId
- Old values (JSON, for Edit/Delete)
- New values (JSON, for Add/Edit)
- Description
- IP address + timestamp
Compliance-grade — never edit or delete log rows. Filter by user / date / screen to reconstruct any record's history.
Common tasks
- 1. Filter by Date Range, User, or Screen
- 2. Click any row → view OldValues / NewValues JSON to see exactly what changed
The same help appears on this screen inside LogiSoft.
Append-only log of every CREATE / EDIT / DELETE / page-view across the system. Filterable by user, screen, date.
Tools
-
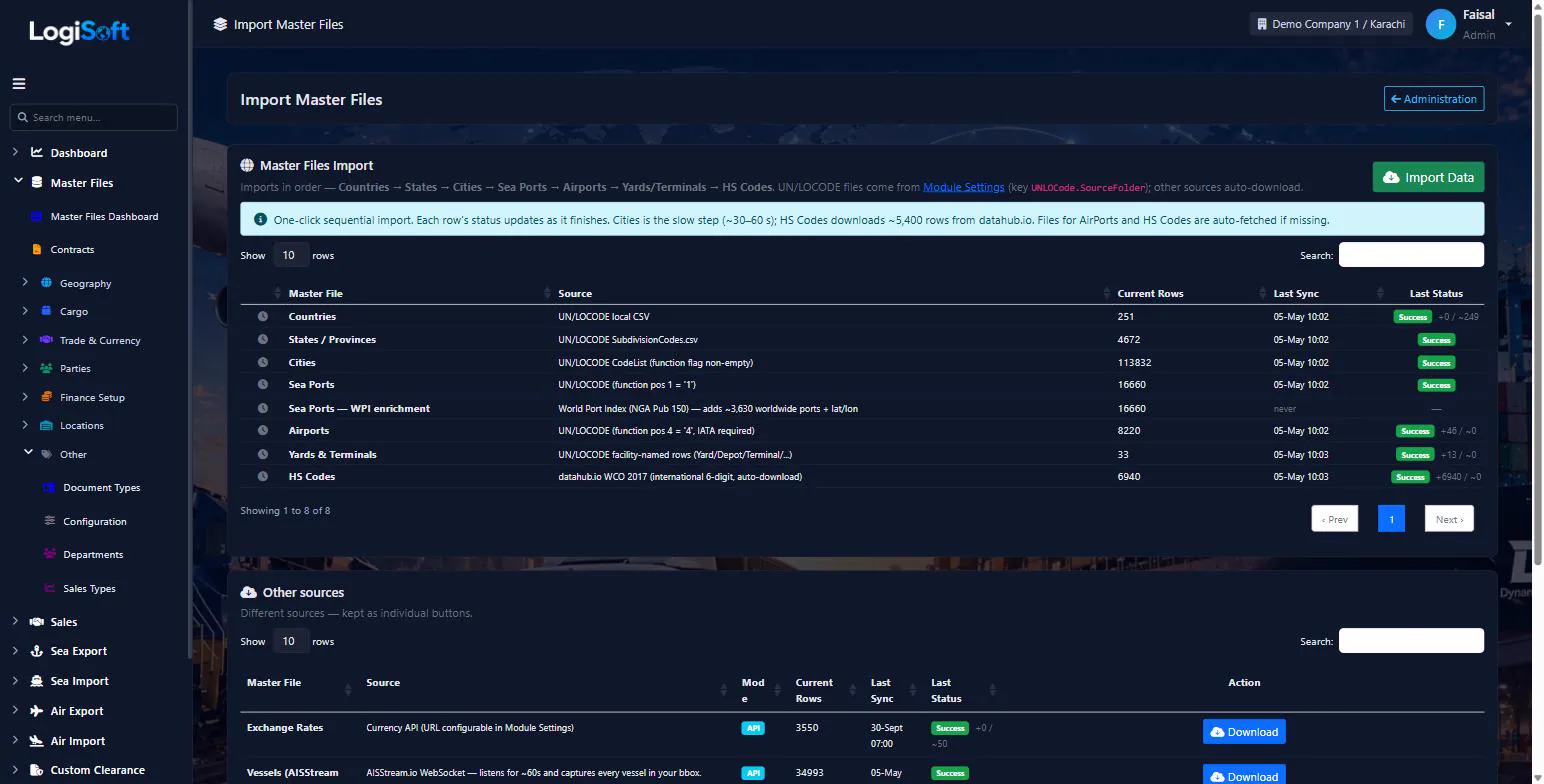
Import Master Files
?LogiSoft help
Import Master Files
One-click data refresh from external sources: Countries (REST Countries), Exchange Rates (currency-api), UN/LOCODE (geography + ports), AirPorts (lxndrblz), HS Codes (FBR PDF).
Import Master Files is the bulk-data refresh screen. Each row = one master file source with Last Sync timestamp + Sync button. UN/LOCODE has a sequential 5-step button (Countries → States → Cities → SeaPorts → AirPorts) with per-step progress.
Configuration of each source is in [Module Settings](/ModuleSettings/Index) under Master Files module — URLs, API keys (where needed), local folders.
Common tasks
- 1. Click Sync button next to a row
- 2. Wait for status icon to update (clock → spinner → check / X)
- 3. Errors show inline with details
- 4. Sync log table at the bottom records every run
The same help appears on this screen inside LogiSoft.
One-click data refresh from external sources: Countries (REST Countries), Exchange Rates (currency-api), UN/LOCODE (geography + ports), AirPorts (lxndrblz), HS Codes (FBR PDF).
Settings
-
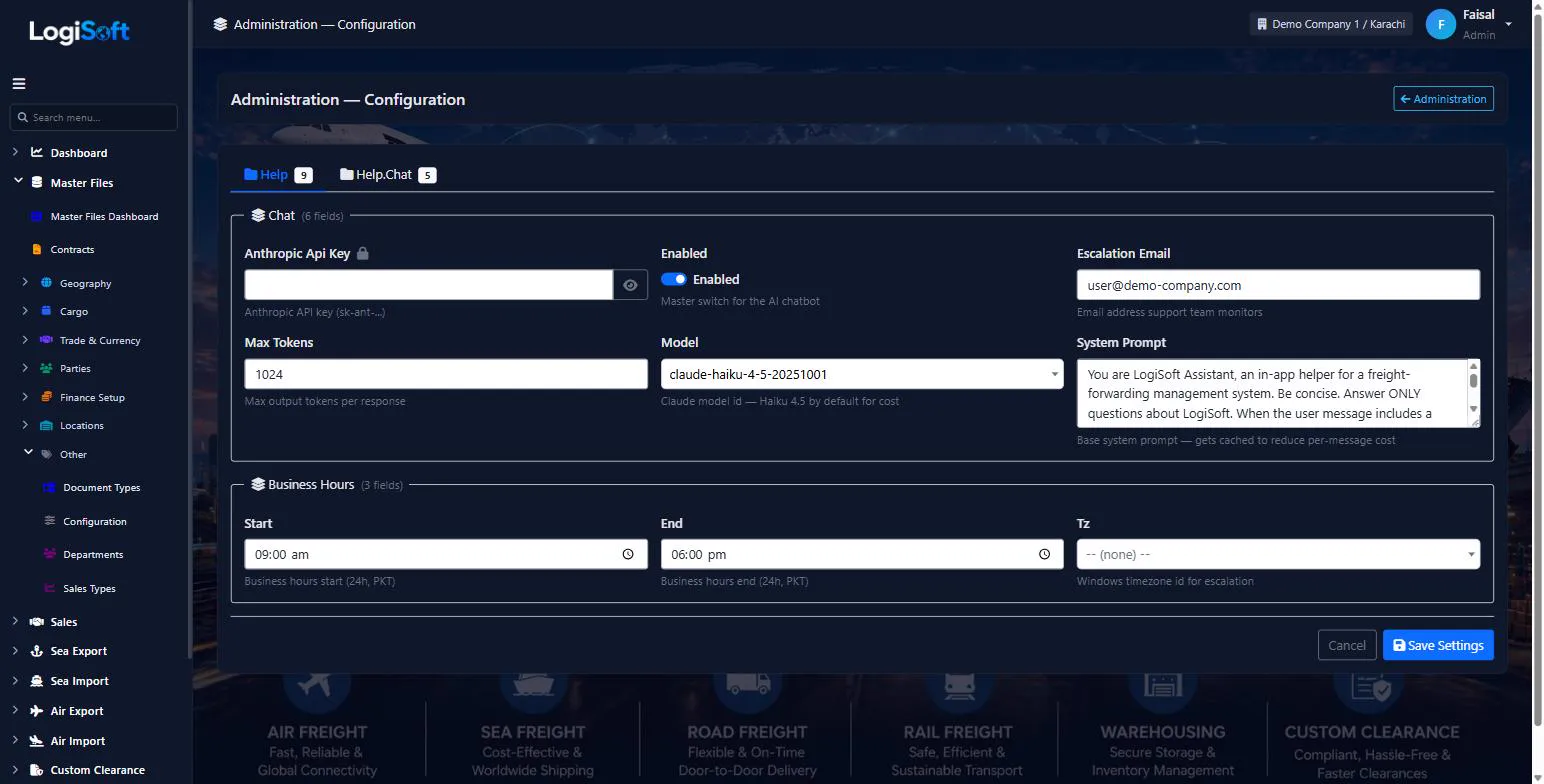
Configuration
Part of the Administration module.
Configuration
-
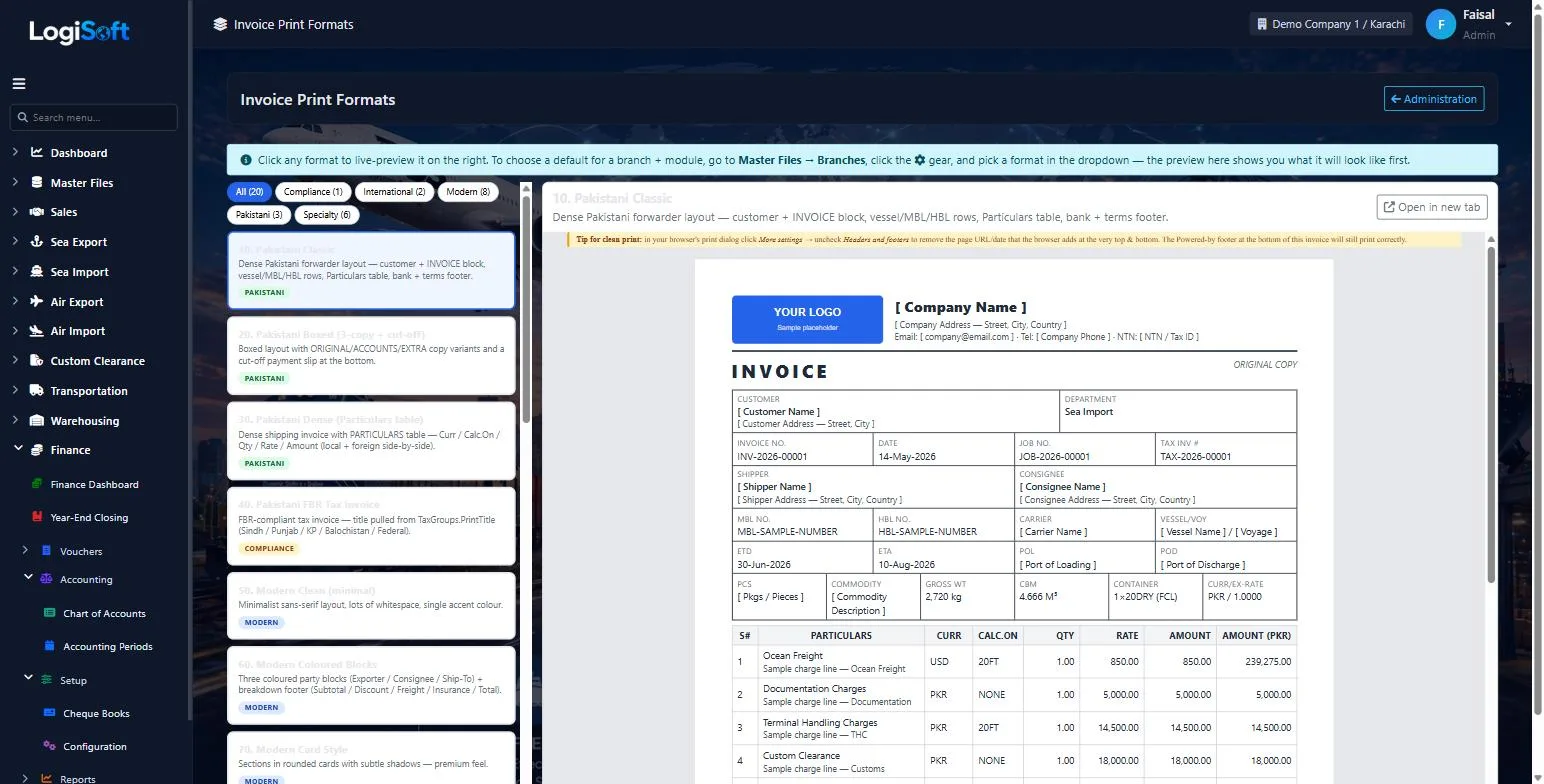
Invoice Print Formats
Part of the Administration module.
What's included
Everything in the Administration module.
Organisation
- Company groups, companies and branches
- Tax group per branch
- Per-branch defaults
- Departments
Security
- Rights per role and screen
- User overrides
- Date-access limits
- Audit log of every change, login and page view
System
- Module settings
- Email (SMTP) profiles
- Updates applied from inside LogiSoft
Can one user work in several branches?
Yes. Users can be given access to more than one company and branch, and new records carry the branch they were created in.
Is every change recorded?
Yes. The audit log records every add, edit and delete with who did it and when, plus logins and page views.
Works together with
See all features →Master Files
Every list your team picks from, kept in one place: parties, ports, cities, HS codes, currencies, container types and more, with imports so you do not start from scratch.
Explore Master FilesSea Import
Book space against your carrier contracts, sell it to customers, collect shipping instructions, open the Master and House B/Ls, track every milestone and invoice the job, all in one flow.
Explore Sea ImportWarehousing
Receive, store and deliver goods for your customers, with stock tracked by warehouse, owner, product, batch and location.
Explore WarehousingReady to retire your desktop freight tools?
See LogiSoft on your own workflow in a 30-minute screen share with the founder. No commitment.